Back in Objective-C, we prepared all of our view controller properties in viewDidLoad because that was our only option unless we wanted to subclass every element to provide custom initializers. Using some tricks in Swift, we can provide clear, readable initalization outside of viewDidLoad that makes our code easier to read and reason about.
The old, bad way
Here’s a traditional viewDidLoad that I would have written when starting in a new view controller in Swift after working in Objective-C for years previously:
class ViewController: UIViewController {
    let topView = UIView()

    override func viewDidLoad() {
        topView.frame = CGRect(0, 0, 100, 200)
        topView.backgroundColor = UIColor.redColor()
        view.addSubview(topView)
    }
}
We initialize our topView as a property because we want to have access to it elsewhere for animation, etc. Once the view is loaded, we configure the parts of our view that we want to modify before placing it as a subview. This is straightforward to look at for a single view (albeit a bit disconnected) but you can see how this can quickly get cluttered as more and more views are configured and added during viewDidLoad.
class ViewController: UIViewController {
    let topView = UIView()
    let imageView = UIImageView()
    let goButton = UIButton()

    override func viewDidLoad() {
        topView.frame = CGRect(x: 0, y: 0, width: 100, height: 200)
        topView.backgroundColor = UIColor.redColor()
        view.addSubview(topView)

        imageView.image = UIImage(named: "profile")
        topView.addSubview(imageView)

        goButton.frame = CGRect(x: 0, y: 0, width: 30, height: 30)
        goButton.setTitle("GO!", forState: .Normal)
        view.addSubview(goButton)
    }
}
…and so on and so forth.
Convert to initialization closures
With Swift, we can minimize the amount of code that is arbitrarily ordered in viewDidLoad and move most of the configuration into the same space that we use for property initialization. The Swift documentation mentions these as a way to provide property configuration but doesn’t give them a specific name, I’m fond of the term “Initialization Closure”.
By moving these configuration steps up to the point of initialization, we keep related configuration code together and keep view setup code in its proper place. After you’ve added ten other pieces of view into this view controller, you can still tell exactly where to go to change some configuration detail without digging through and entire view hierarchy setup.
class ViewController: UIViewController {
    let topView: UIView = {
        let view = UIView()
        view.frame = CGRect(x: 0, y: 0, width: 100, height: 200)
        view.backgroundColor = UIColor.redColor()
        return view
    }()

    let imageView: UIImageView = {
        let imageView = UIImageView()
        imageView.image = UIImage(named: "profile")
        return imageView
    }()

    let goButton: UIButton = {
        let button = UIButton()
        button.frame = CGRect(x: 0, y: 0, width: 30, height: 30)
        button.setTitle("GO!", forState: .Normal)
        return button
    }()

    override func viewDidLoad() {
        view.addSubview(topView)
        topView.addSubview(imageView)
        view.addSubview(goButton)
    }
}
In fact, now that we’ve decoupled configuration from view setup, we’re more free to place the view setup in what might be a more appropriate location, sometimes viewDidAppear, viewDidLayoutSubviews or likewise. I know that I was fond of keeping them all together in viewDidLoad simply because it was easier to group at all the configuration and setup together.
In most cases this is actually the behavior that we want; set up our properties when the parent object is initialized and then do the minimal amount of work to set up the view when it’s required. In rare cases where initialization takes a long time you might see a difference in behavior but these would be just as likely to cause a jerky view controller when placed in viewDidLoad. These highly latent tasks are better left off the main thread entirely, initialized after the parent object is created and placed in an optional property so you can optionally unwrap and tell if some asynchronous process has completed or not.
Storyboard people are people too
I know there are at least a few people who prefer to setup their views in Storyboards though and are feeling left out of the awesome Swift tool club right about now. Luckily there’s a solution for them too and it might just make you a storyboard convert. Just as we can customize get and set on properties, we can also provide our own implementation for didSet and willSet and then use them in conjunction with @IBOutlet.
I have to admit, I do like setting my views and constraints in Storyboards because I find myself tweaking element spacing constantly and it’s much more obvious how to move elements in the Storyboard preview than looking at the simulator and then guessing at hard coded numbers. One thing I don’t like doing in Storyboards, however, is configuring view details. The right pane in the Storyboard editor is a mess and if you can’t find the thing you want to customize, you don’t know if it’s just hidden or it simply can’t be customized in Interface Builder at all.
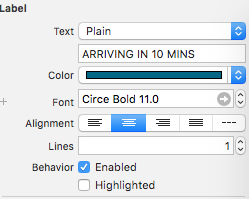
Not very clear which of these are defaults or how to share them between elements
The solution is to place your views and constraints in Interface Builder and then configure them in code. It’s surprisingly easy to do the basics in Storyboards, just to get a sense of what the scene will look like and how everything is hooked up and it improves searchability of your view configuration code. If you’re creating common styles across your whole app, you can even customize them in the didSet block rather than doing the same configuration each time.
class ViewController: UIViewController {
    @IBOutlet weak var arrivalLabel: UILabel! {
        didSet {
            arrivalLabel.text = "Arriving in 10 minutes".uppercaseString
            arrivalLabel.font = UIFont(name: "CirceBold", size: 11)
            arrivalLabel.textColor = UIColor.blueColor()
            arrivalLabel.textAlignment = .Center
            arrivalLabel.numberOfLines = 1
        }
    }

    @IBOutlet weak var departureLabel: UILabel! {
        didSet {
            Styles.setStandardLabelStyles(departureLabel)
        }
    }
Some gotchas with bad error messages:
-
Remember to call the initialization closure with (). I forget this constantly. Otherwise you’re assigning a closure, not the result of the closure, to some other type like
UIViewand you’ll get Cannot convert value of type ‘() -> _’ to specified type errors. -
Another notable issue you might run into is Cannot assign value of type ‘NSObject -> () -> ViewController’ to type ‘ImagePickerDelegate’ or similar phrasing when trying to set a property to
selfinside an initialization closure. I suspect this is simply an issue withselfnot truly existing until all of the properties are initialized and an error message that only makes sense if you know the Swift internals. Luckily there’s an easy fix: just make the property lazy and self will exist when your initialization closure is run.
Here’s an example of setting up an ImagePicker as a property where we want to set up delegate and limits on how many images can be picked:
class ViewController: UIViewController {
    lazy var imagePickerController: ImagePickerController = {
        let picker = ImagePickerController()
        picker.delegate = self
        picker.imageLimit = 1
        return picker
    }()
}